

In the first UI Animation in Photoshop tutorial, I have shown the way to do simple animations in Photoshop like moving, scaling and style changing – if you are new to this and haven’t check that out yet, I recommend you to look into Tutorial #1 before this.
In this second tutorial, I will share my experiences in applying easing into the animation made with Photoshop. Special thanks to Jovie Brett Bardoles for sharing his manual way of applying easing in his animations, which inspire me to explore and dig into the Timeline feature in Photoshop.
What is Easing and Why?
Easing controls the speed of the animation to achieve realistic effect. The statement below from easings.net is pretty spot on about why easing is important:
Objects in real life don’t just start and stop instantly, and almost never move at a constant speed.
And this is why you want to have easing applied into the UI animation because you want the UI to feel natural with some familiar physics properties rather than an artificial one that move linearly. Look at the example below, you can immediately noticed the subtle difference in terms of the animation naturality. (Left – with Ease Out function, Right – Linear)

Though keep in mind that easing in animation made using Photoshop is very basic and manual, and it has nowhere near the easing effect done in After Effect, but for simple animation, it does the job well (at least for me!). By manually modifying the linear keyframes in some patterns, we will be able to achieve the easing effect in the animation.
Prepare for Animation
- Create a new document at 800px x 600px, color the background to any color (Blue, for example)
- In the new document, create a new rounded rectangle at 400px x 400px with 4px corner radius, and place it in the middle. Change the rounded rectangle color to White.
- Convert the rounded rectangle to a Smart Object (so you can do transformation on it)
- Activate Timeline window (Window > Timeline)
- Click Create Video Timeline button
- At the right top corner of the Timeline window, click to show the menu, then Set Timeline Frame Rate…, and set it to 60fps.
Applying Easing
Let’s get started, shall we? We will going to animate the expanding card, similar to the animated gif above.
STEP 1
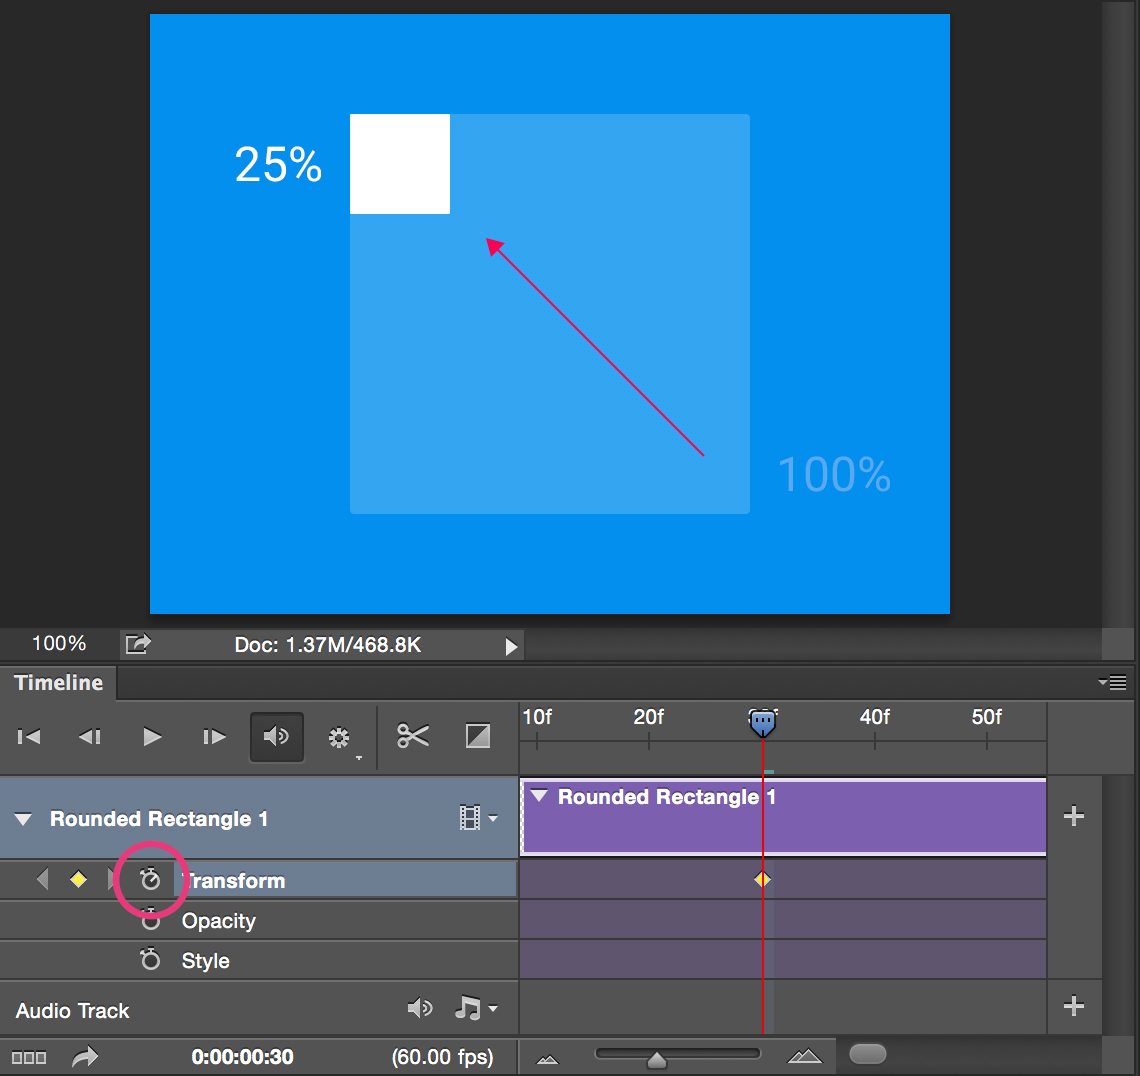
At timeline, drag the slider to 30f, then click on the Stopwatch icon to initiate keyframe for Transform. You should see a keyframe is added at 30f. At the same keyframe, resize the rounded rectangle smart object to 25%.
STEP 2

Move the slider to 54f. We will make the animation complete in 0.4s (which is also 24 frames), thus navigating to 54f. At this point, resize the rounded rectangle smart object back to 100%. A new keyframe will be added into the timeline automatically.
STEP 3
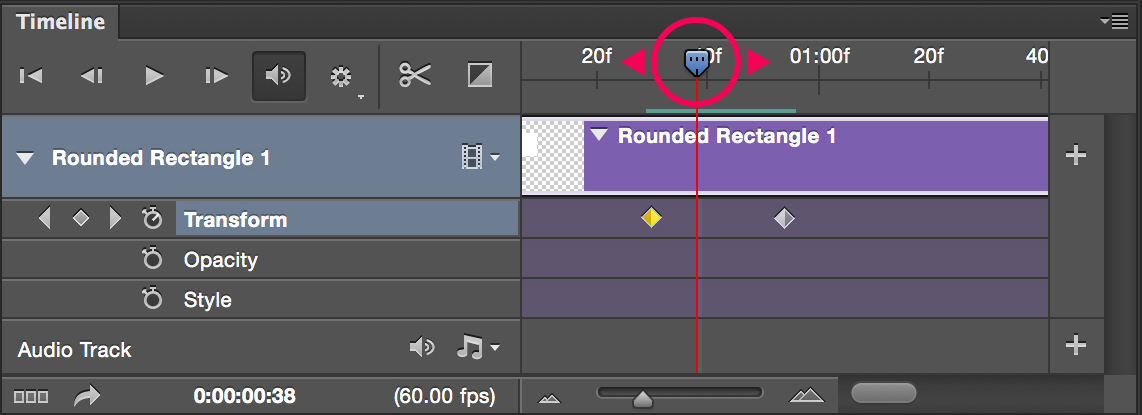
Drag the slider from the first keyframe to the second keyframe, you should be able to see the animated card with expanding animation. If you do not see it, delete the keyframes and do it again from Step 1.
STEP 4
Now the fun part started! Drag the slider to 53f (one frame before the last keyframe), then click the add keyframe icon at the left panel to add a new keyframe.
STEP 5
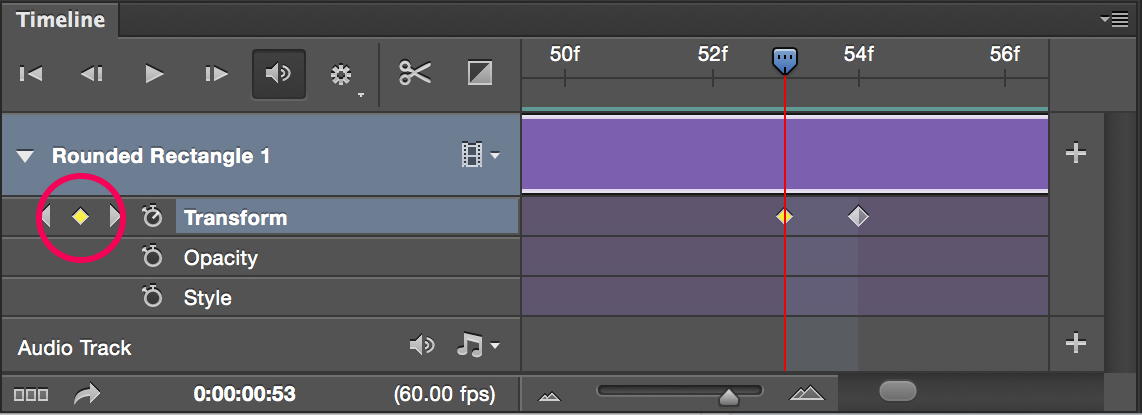
Click on the newly added keyframe at 53f, drag and move it to 50f. Noticed that you just moved the keyframe 3 frames before the initial frame position.
STEP 6

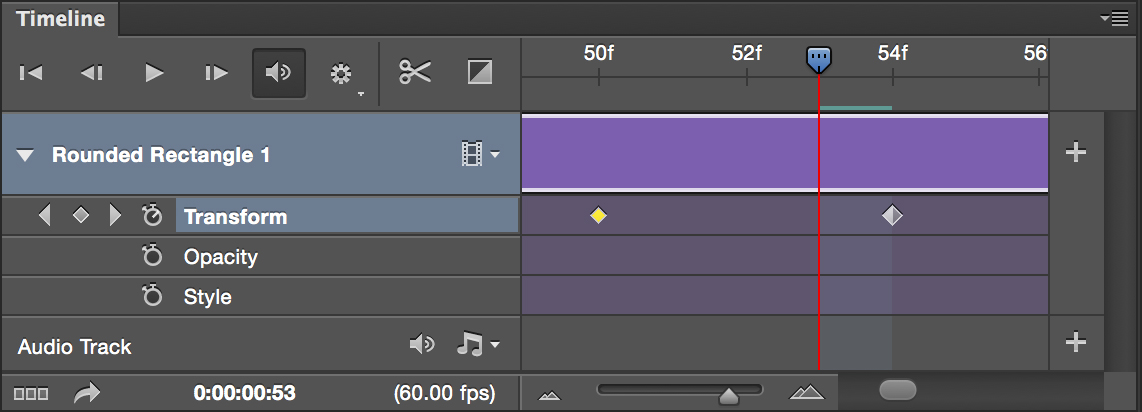
This is pretty much repeating the same procedure in Step 4 and 5. Drag the slider to 49f (one frame before the newly dragged keyframe), then add a new keyframe.
STEP 7
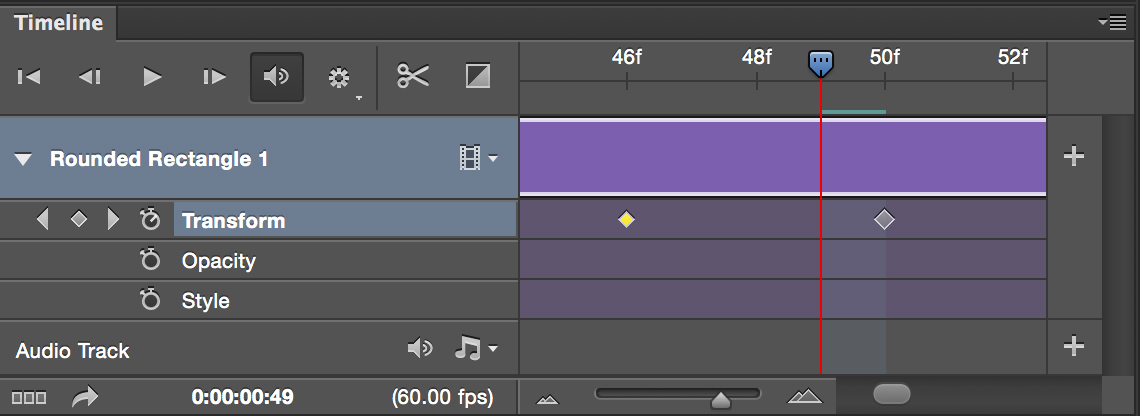
Similarly, drag the new added keyframe at 49f to 46f. Again, you moved it 3 frames before the initial frame position.
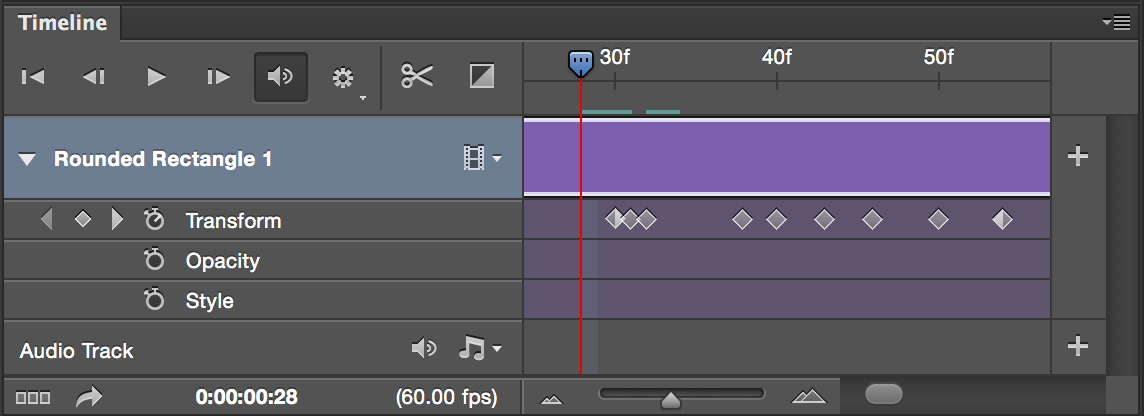
STEP 8

Repeat the similar procedures again, but with smaller steps:
- Add keyframe at 45f, then move to 43f. (2 steps)
- Add keyframe at 42f, then move to 40f. (2 steps)
- Add keyframe at 39f, then move to 38f. (1 step)
If you do it right, you should be able to see the keyframes in this specific pattern.
STEP 9
Now doing similar procedures for the front part:
- Add a keyframe at 33f, then move to 31f. (2 steps)
- Add a keyframe at 33f, then move to 32f. (1 step)
If you do it right, you should be able to see the keyframes in this specific pattern.
STEP 10
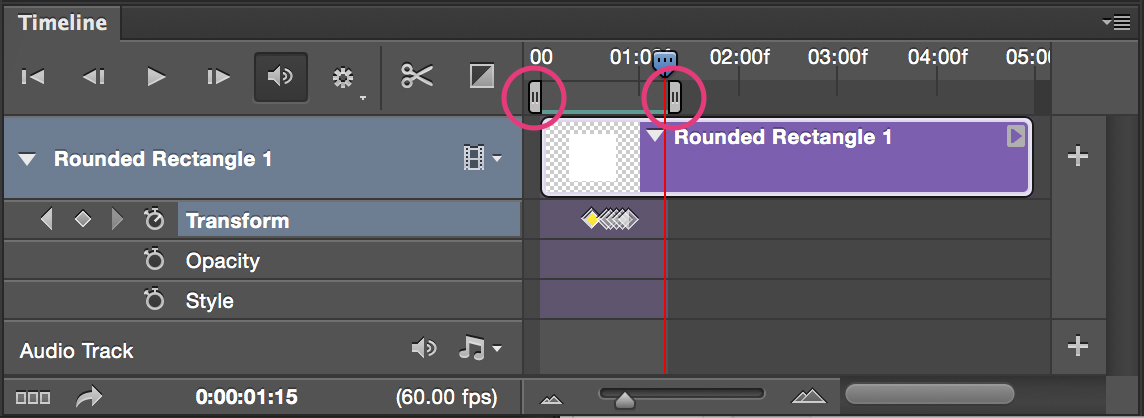
Zoom out the timeline, then drag the start and end handler to adjust the work area so the animation will cover just the part with keyframes. Tap spacebar key and preview the result!
CHALLENGE
Now, a challenge for you! Using very similar way, but in a reverse fashion, complete the animation with collapsing cards, plus the easing.
Wait, what just happened?
You just successfully added Ease Out effect to the expanding card animation! How does that happen?
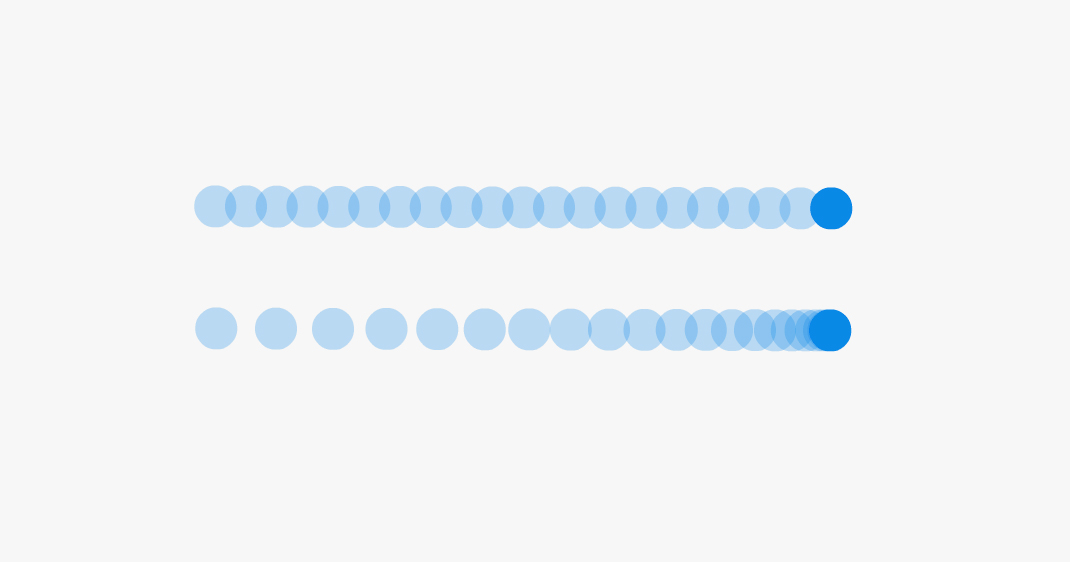
If you look at the image above, there are 2 moving circles from left to right, with all the frames shown. The top circle moves in linear motion, therefore each frame are evenly distributed from the left to the right.
The bottom circle moves with ease out effect, where you can clearly see that there are less frames at the start (which means it move fast), and a lot of frames at the end (which means it slows down). This is exactly what we are doing from Step 5 – Step 8, where we ‘squeeze’ more frames towards the end, and at Step 9, we reduce the frames.
You may have noticed that during the keyframes modification, we are doing it in a gradual pattern (3 steps, 2 steps, 1 steps) – this is to achieve the natural speed increment and decrement, so the animation is obeying the physics properties that we are familiar with. However, this is mainly based on guess work – I did not drill down the easing formula to find the best pattern, but it seems for me a good starting point. If you manage to find a pattern that provides smoother easing, do let me know!
Final Word
This is just one of the example for easing – a fast in slow out motion, which is very suitable for UI animation. Once you get the idea, you can definitely can achieve some other easing effects with some experiments.
Of course, if it’s meant for final production work, I would still recommend using After Effect because it is much easier to do complicated motion design with proper easing.
Below are some of the websites that I referred during the experiment which you might find them interesting:
http://upshots.org/actionscript/jsas-understanding-easing
Don’t hesitate to share your motion design following the tutorial, until next time!
You can download the tutorial PSD here.

I haven’t released this before, but I have written a script for Photoshop to do every jQuery easing animation. It has bugs, but it replicates the easing motion perfectly.
http://timothywhalin.com/files/Photoshop_Easing_Script.zip
Ah sounds awesome! Will take a look – thanks a lot Timothy!
Taylor
Hi Taylor! Please, do give us a third tutorial! It’s getting very interesting!
Thanks a lot for the interest – sure, let me think of 3rd 😉
For instance, why not take on Timothy’s script and animate objects with it? I’ve been playing with the script for a while and it’s great! It has bugs, though. But it sure helps!
Oh definitely – i have been using it for quite some time since then, it is very helpful! Yeah, will work on that plus some extra goodies 🙂
Taylor
Thanks! Me and a couple of folkes of at work, we follow your posts religiously 🙂 Have a nice weekend!